


Table of Contents
The Mazercise puzzle is widely considered one of the most confusing objectives in Five Nights at Freddy’s: Security Breach. Unlike most puzzles in the game, the controls don’t explain how each button affects the maze, making it easy to become stuck after pressing random combinations.
Many online guides provide a fixed button sequence. While that can work if your maze is still in its default configuration, it often fails once you’ve already changed the maze layout.
This guide takes a different approach. Instead of relying on a single combination, it explains how to manipulate the maze until you create the opening needed to reach Monty Golf.
Before You Start
Make sure you have:
- Mazercise Control Key
- Access to the Mazercise control panel
If you haven’t obtained the Mazercise Control Key yet, you’ll need to progress through the story before this puzzle becomes available.
Understanding the Mazercise Controls
The control panel consists of several numbered buttons and a red lever.
Each numbered button shifts specific sections of the maze, while the lever changes the movement direction between horizontal and vertical.
Since multiple walls move simultaneously, pressing buttons without a plan can quickly make the maze much more confusing.
For this reason, it’s best to follow a structured approach instead of trying random combinations.
Step 1 – Locate the Dark Green Maze Section
Before changing any controls, identify the dark green section of the maze. This is the section you’ll be moving throughout the first part of the puzzle.
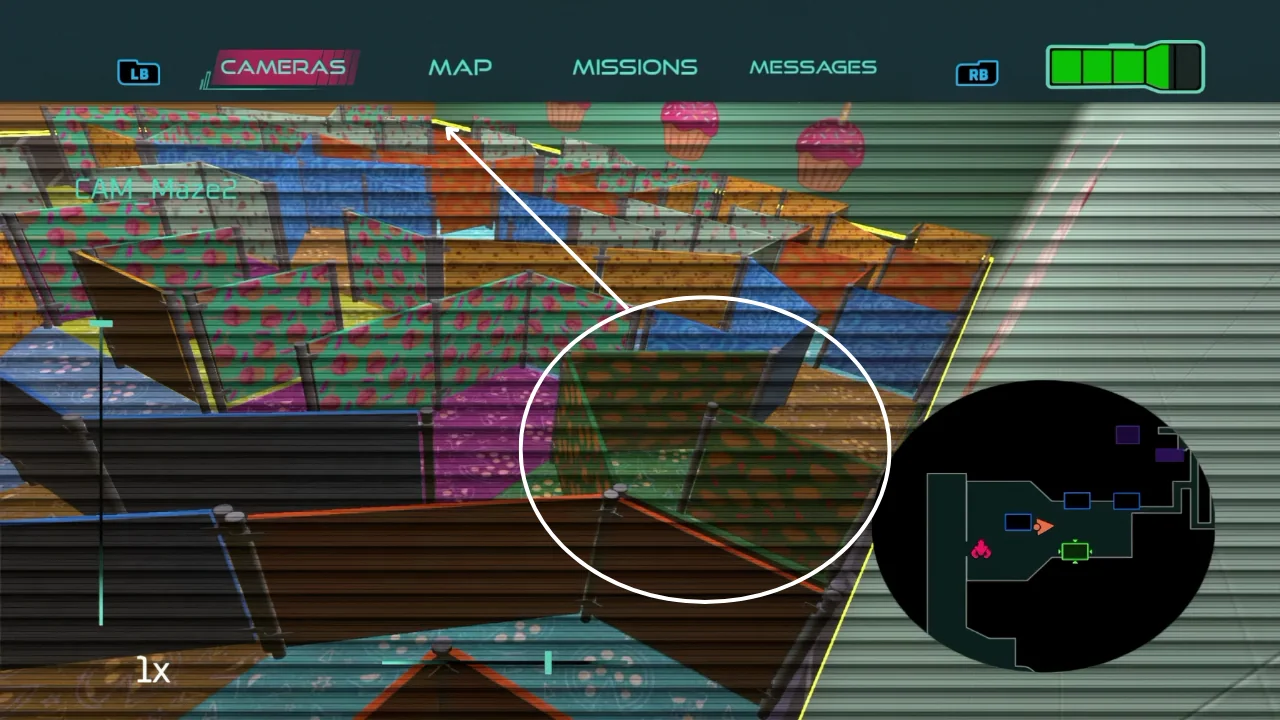
Your goal is to move this section into the top-left corner, directly beneath the air vent shown in the image below.
Step 2 – Set the Lever to the Down Position
Go to the Mazercise control panel and make sure the red lever is pointing downward.
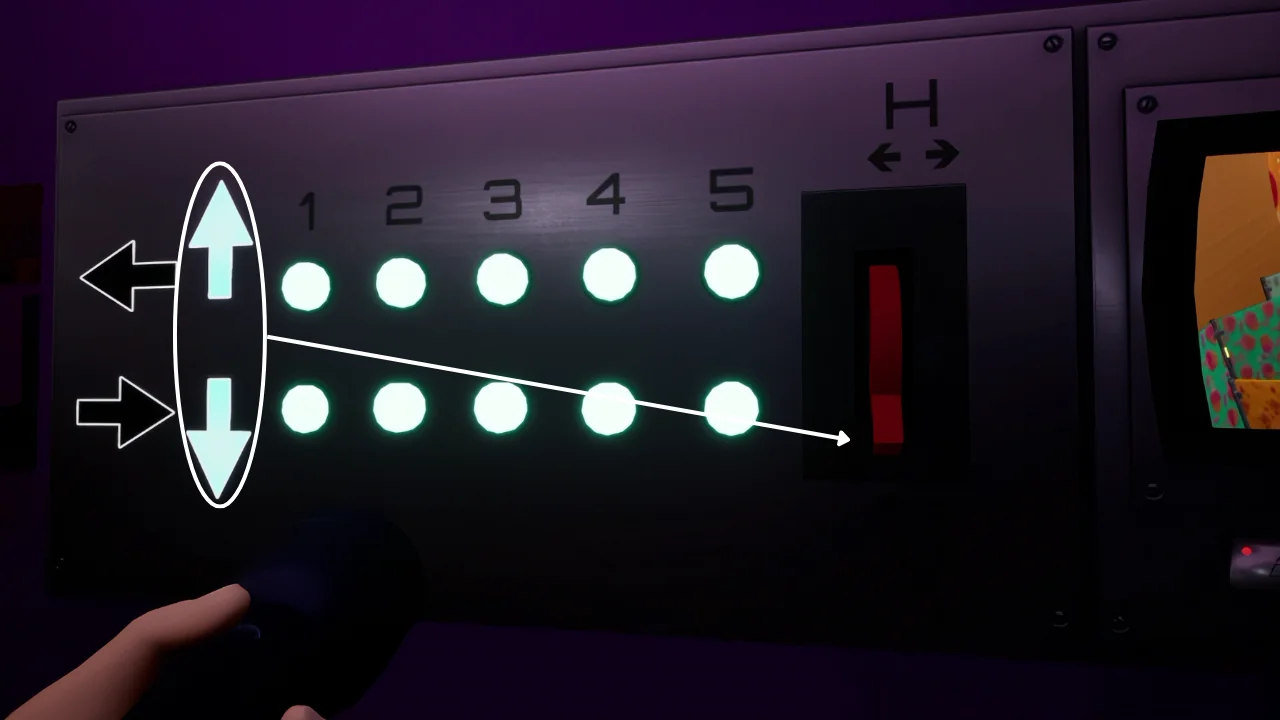
This changes how the numbered buttons move the maze sections and is required for the next step.
Step 3 – Press the Top Button 5
With the lever pointing down, repeatedly press the top Button 5.
- If the maze is still in its default position, press it four times.
- If you’ve already moved the maze before following this guide, reduce the number of presses accordingly.
Keep pressing until the dark green section reaches the top-left corner, directly beneath the air vent.
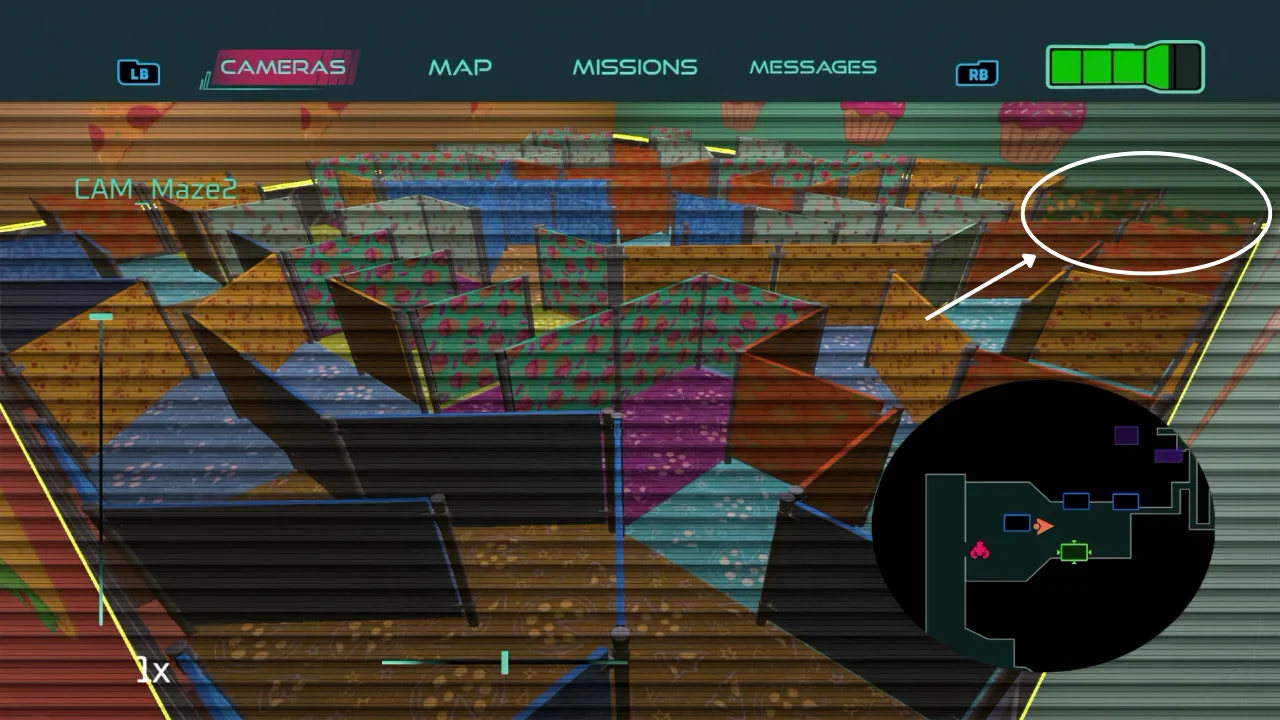
Note: If you’ve already experimented with the controls, don’t worry if your button count is different. The important part is matching the final position of the dark green section rather than the exact number of presses.
Step 4 – Move the Lever to the Up Position
After positioning the dark green section in the correct location, return to the Mazercise control panel and move the red lever upward.
This changes the maze movement direction and prepares the next adjustment.
Step 5 – Press the Top Button 1
With the lever pointing up, press the top Button 1.
- If your maze matches the previous step, press the button four times.
- Keep an eye on the maze after each press.
Your goal is to move the maze section until it reaches the position shown in the image below, aligned with the air vent.
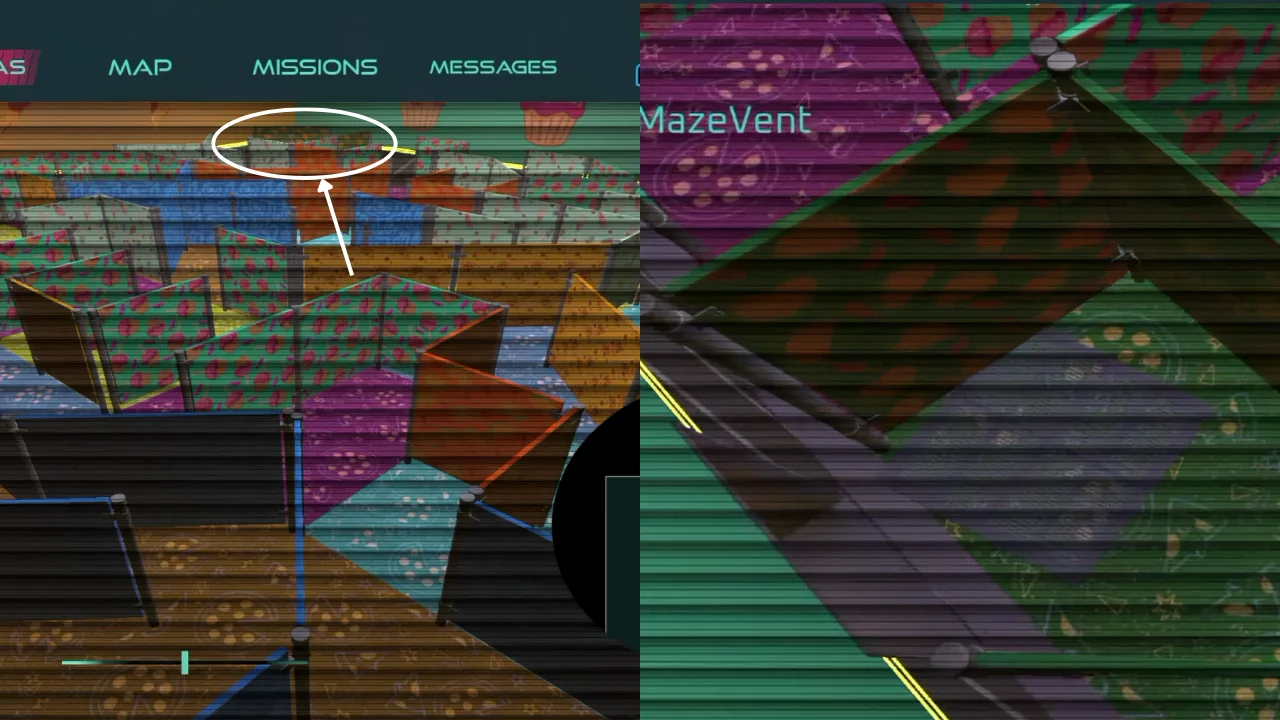
Once your maze matches the reference image, you’re ready to continue to the next step.
Note: If your maze doesn’t line up exactly after five presses because you’ve previously altered the layout, continue adjusting until it matches the reference image. The final position is more important than the exact number of button presses.
Step 6 – Follow the Final Button Sequence
Once the dark green section is aligned with the air vent, follow this exact sequence on the Mazercise control panel:
- Move the lever up.
- Press the top Button 2 twice.
- Move the lever down.
- Press the top Button 2 four times.
- Move the lever up.
- Press the bottom Button 2 once.
- Press the top Button 3 once.
- Press the top Button 2 once.
- Move the lever down.
- Press the bottom Button 2 three times.
If your maze matches the same configuration shown in the previous steps, this sequence should create the correct opening.
Step 7 – Verify the Opening
After completing the sequence, check the maze using the security camera.
You should see an opening similar to the one shown below.
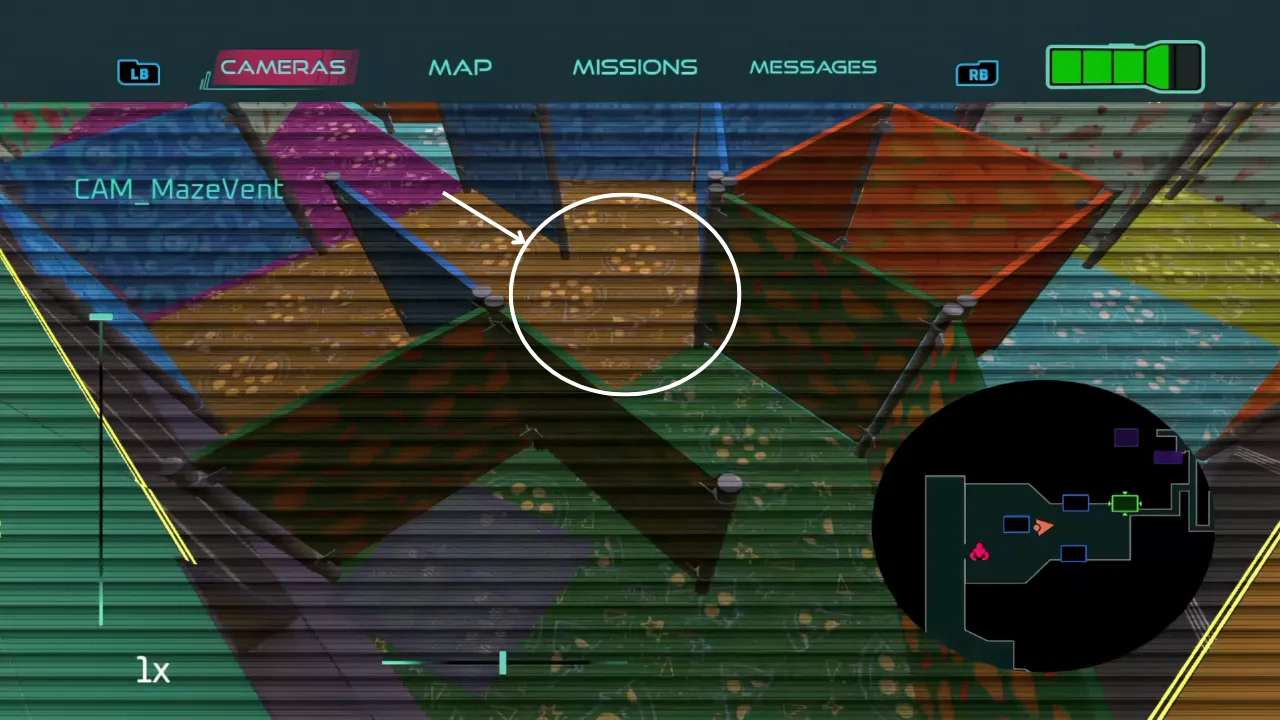
This opening creates the path needed to continue through the maze and reach Monty Golf.
What If the Sequence Doesn’t Work?
If the opening doesn’t appear after following the button sequence, don’t panic. Your maze may be in a different configuration because of previous button presses.
Instead of restarting the puzzle, leave the lever in the down position and repeatedly press the bottom Button 2.
After each press, check the maze and compare it with the image above. Once your maze matches the reference and the opening appears, stop pressing the button and continue through the maze.
Tip: The final maze layout is more important than reproducing the exact number of button presses. If your configuration differs from mine, use the reference image as your goal and continue pressing the bottom Button 2 until the opening matches.
FAQ (Frequently Asked Questions)
Why isn’t the Mazercise puzzle working?
The puzzle may not work if you’ve already pressed random buttons before following a guide. Instead of relying on an exact button sequence, compare your maze to the reference images in this guide and match the final layout.
Do I need the Mazercise Control Key?
Yes. You must obtain the Mazercise Control Key before you can use the puzzle’s control panel.
Can I reset the Mazercise puzzle?
There isn’t a dedicated reset button. If your maze is in a different configuration, continue adjusting the walls until they match the layout shown in this guide.
Is the Mazercise puzzle random?
No. The puzzle follows fixed movement patterns, but your maze’s current layout depends on the buttons you’ve pressed previously.
Where do I go after completing Mazercise?
Once you’ve opened the correct path, continue through the maze to reach Monty Golf, where the next part of the story takes place.
Can I skip the Mazercise puzzle?
No. Completing Mazercise is required to progress through the main story and access Monty Golf.
Why do most Mazercise guides not work?
Many guides assume the maze is still in its default configuration. If you’ve already changed the layout, those button sequences may no longer produce the same result.
