Table of Contents
The battle against the Devil serves as the final confrontation in Cuphead and represents one of the most formidable challenges in the entire game. This combat takes place in Inkwell Hell, the final area of the campaign, and demands precision, rapid reflexes, and a comprehensive understanding of the boss’s attack patterns.
Unlike many previous bosses, the Devil employs multiple phases, each featuring unique mechanics and offensive strategies. Mastering these phases is essential to surviving and emerging victorious.
You may also like: How to Solve the Graveyard Puzzle in Cuphead
Preparation Before the Fight
Before engaging the Devil, it is advisable to select a Cuphead weapon loadout that balances damage output with character mobility. A highly effective combination involves using the Charge Shot to deal significant damage from a distance, paired with the Spread Shot for dealing massive damage at close range.
Regarding Super Arts, the first Super Art is generally the safest choice, as it allows for a quick burst of damage. For the charm slot, the Smoke Bomb is exceptionally useful; it grants the ability to phase through attacks during a dash, which is invaluable during the fight’s most chaotic segments.

Phase One: The Devil’s Transformations
In the beginning, the Devil utilizes a variety of transformations. This phase functions as an adaptation test, as the boss cycles through different forms and offensive patterns.
At times, the Devil transforms into a spider-like creature. During this attack, a spider head appears at the top of the screen, and small minions descend toward the player. The boss will attempt to predict your movement; to avoid damage, you must dash in one direction and quickly reverse course.

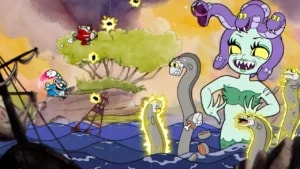
In another transformation, the Devil assumes a snake-like form that fires ball-shaped projectiles. These attacks require constant movement and keen attention to the rhythm of the shots, as the projectiles bounce and can saturate the screen. The Smoke Bomb becomes a powerful ally here, allowing you to bypass projectiles without sustaining damage.

The Devil may also adopt a dragon-like form, stretching from one side of the screen to the other. During this phase, the best strategy is to continue firing with the Spread Shot to manage any summoned minions, while moving to the opposite side of the screen from the boss. Essentially, prioritize evasion while maintaining your offensive pressure.

Another common attack involves giant arms sweeping horizontally across the screen. When this occurs, the player must time their jumps precisely to avoid impact while continuing to deal damage.

Finally, the Devil may launch fire projectiles that create a gap in the center, offering an opportunity to perform a parry. Focus on executing the parry correctly and jump between the fire segments if you find yourself running out of room.

After receiving sufficient damage, the Devil disappears, the floor of the arena gives way, and the second phase begins.
Phase Two: The Cave Room
In this phase, the setting shifts to the deepest part of the underworld. The Devil expands his form, occupying the background while platforms float around a central rotating disc. This phase requires precise platforming and awareness of his primary hazards.
One frequent attack involves poker chips falling from the sky and bouncing across the screen. These chips can create complex situations, as they occupy multiple areas simultaneously. The best approach is to observe their landing points and position your character in safe zones before they strike the floor.
Another dangerous maneuver occurs when the Devil throws spinning tridents that traverse the screen. These require a well-timed jump or dash to avoid damage. This phase is generally faster than the first, but it can quickly become chaotic if the player loses control of their positioning. Maintaining constant movement and attacking whenever a safe window arises will help shorten the encounter. Once enough damage is dealt, the Devil reveals his final form.

Final Phase: The Underworld
The final phase takes place on floating platforms suspended over a pit of fire. The Devil becomes extremely agitated, reducing the player’s available platforms from five down to three, while new attacks intensify the pressure.
In the first part of this phase, he summons two minions in the corners of the map, accompanied by small bats that descend from the top of the screen. The minions fire a skull in a straight line, which can easily damage the player; it is ideal to eliminate them as quickly as possible using the Spread Shot.

The bats will perform individual lunges, but they have low health and can be dispatched easily with the same weapon.
In the final stretch, the Devil reduces the arena to only one platform and unleashes his primary attack: tears falling from his eyes. These projectiles descend toward the platforms, significantly limiting your movement space.

The restricted arena makes every error costly. The key here is to navigate around the falling tears while managing the falling poker chips. Alternatively, you can perform a jump and use the Smoke Bomb toward the center of the platform when there is a momentary lull in the falling tears and chips. This strategy is riskier, as it requires extremely agile reflexes.
Once the boss’s health is fully depleted, the Devil is defeated, and the battle concludes.